Apro logo

How to Adjust Garage Door Springs: Easy Guide

Learn how to adjust garage door springs safely with our step-by-step guide. Identify the type of spring and follow expert tips for smooth operation.
Apro / Blog / How to Adjust Garage Door Springs: Easy Guide

Table of Contents

Garage door springs are vital components that help your door open and close smoothly.

These springs counterbalance the weight of the door, making it easier for you to operate.

White garage door with windows and metal tracks visible

Adjusting your garage door springs ensures everything functions properly, reducing strain on the opener and preventing potential safety hazards.

Regular adjustments keep your door running smoothly and safely, so it’s worth taking the time to do it right!

Adjusting your garage door springs can seem like a challenging task, but with the right guidance and precautions, it’s something you can tackle yourself.

Whether your door is moving unevenly or not opening properly, adjusting the springs could be the solution. Let’s walk you through the steps to do it safely and effectively.

Step 1: Ensure Safety First

Diagram showing parts of a garage door opener and accessories

Before you start adjusting your garage door springs, safety is your top priority.

First, disconnect the power to the garage door opener.

This prevents any accidental activation while you’re working.

Make sure to wear protective gear like gloves and safety glasses to safeguard yourself from debris or spring recoil.

Important Safety Note: Garage door springs are under a lot of tension.

If they’re not adjusted correctly, they can snap, causing serious injury or damage.

Always be cautious when handling them.

Step 2: Identify the Type of Spring (Torsion or Extension)

Various types of springs labeled and displayed in a grid

The next step is identifying the type of spring on your door.

There are two main types: torsion springs and extension springs.

  • Torsion Springs are mounted above the door on a metal shaft. They typically work by twisting as the door moves up and down.
  • Extension Springs are mounted on either side of the door, parallel to the tracks, and they stretch and contract as the door moves.

Tip: The position of the springs will help you identify which type you have.

Torsion springs are above the door, while extension springs are located on the sides.

This distinction is important because the adjustment process differs for each type.

Ready to adjust?

Now that you’ve ensured safety and identified the type of spring, you’re one step closer to restoring smooth movement to your garage door!

Step 4: Test the Door’s Movement

Close up of a garage door spring system with a red release cord

Once you’ve made your adjustments, it’s time to test the door’s movement.

Gently raise and lower the door manually to check for smooth operation.

The door should glide easily along the track without resistance or jerky movements.

If the door opens and closes smoothly and evenly, that’s a good sign that your springs are adjusted correctly.

Pro Tip: If the door feels heavy or hard to move, or if it moves unevenly, it could mean that the springs need further adjustment.

Step 5: Make Final Adjustments (if necessary)

A close up of a tensioned garage door spring on the overhead rail

After testing the door’s movement, you may find that it’s still not quite right.

Check for any unevenness as the door moves up and down.

If one side of the door drags or if it’s not level when fully open, you’ll need to adjust the springs further.

You can fine-tune the spring tension in small increments.

Just remember, a little goes a long way!

Make these final adjustments until the door opens and closes effortlessly and evenly across its entire range of motion.

Quick Reminder: Garage door springs need to be adjusted gradually.

It’s always better to make small adjustments and test the door multiple times rather than over-adjusting in one go.

Conclusion

Two garage doors with windows and overhead door mechanism

Regular adjustment of garage door springs is crucial for smooth and safe operation.

Properly adjusted springs ensure your door opens and closes effortlessly while preventing unnecessary wear on other components.

Don’t neglect this simple maintenance task to prolong your door’s lifespan and keep it functioning well.

If you’re unsure about adjusting your garage door springs or encounter any issues, it’s always best to consult a professional.

Garage door springs are under high tension and can be dangerous to handle without the right tools and expertise.

FAQ: Common Questions About Garage Door Springs

1. How Do I Tell Which Garage Door Spring I Need?

To determine the correct torsion spring for your garage door, consider the following factors:

  • Wire Size: This impacts the spring’s durability and load-bearing capacity.
  • Inside Diameter: Affects the spring’s fitting with the shaft.
  • Overall Length: Ensures the spring fits within the garage door system.
  • Wind Direction: Affects the spring’s tension and how it operates.
  • Weight of Garage Door: Heavier doors require stronger springs.

2. What Is the Difference Between a Torsion Spring and an Extension Spring?

Torsion springs are mounted above the door and work by twisting, while extension springs are located on the sides and stretch or expand. Torsion springs are sturdier and last longer (around 15,000-20,000 cycles), whereas extension springs last approximately 10,000 cycles. Torsion springs also tend to be more expensive but provide better long-term performance.

3. How Do You Adjust the Side Springs and Cables on a Garage Door?

To adjust side-mounted springs:

  • Step 1: Open the garage door fully to release tension.
  • Step 2: Secure the door in place to prevent it from falling.
  • Step 3: Remove the spring hook.
  • Step 4: Adjust the tension by using winding bars.
  • Step 5: Test the door for proper balance and functionality.
  • Step 6: Adjust the cable for fine-tuning.

4. How Do You Balance a Garage Door Spring?

A balanced garage door should open and close smoothly without any jerking or resistance. To balance the spring, adjust the tension until the door moves easily and remains level as it opens and closes. Testing by hand is essential to check if adjustments are required.

5. How Many Turns on a Garage Door Spring Chart?

Here’s a quick guide based on door height:

  • 6’6″ Door: 28 quarter turns (7 full turns)
  • 7′ Door: 31 quarter turns (7¾ full turns)
  • 7’6″ Door: 32 quarter turns (8 full turns)
  • 8′ Door: 35 quarter turns (8¾ full turns)

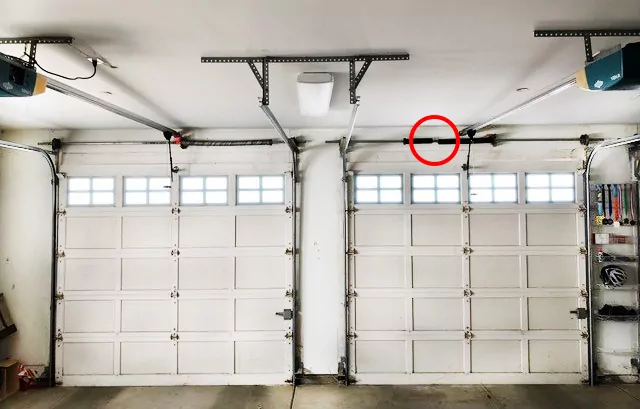
6. Do Garage Doors Have 1 or 2 Torsion Springs?

Most garage doors, especially newer models, have two torsion springs for improved balance, safety, and durability. While smaller doors might function with just one spring, two springs are standard for larger doors, like double-car garage doors, to help distribute the tension evenly.

Related Articles

Table of Contents
Like this article? Share it on:

Lasted Insights From Our Experts

en_USEnglish

Request A Quote From Our Experts Today!

Please enable JavaScript in your browser to complete this form.